
By Chef Ahmad | CookDawn
🥩 Everyone Says Salt It Right Before the Pan. Everyone Is Wrong.
Here is the advice you have heard your entire cooking life. Season your steak right before it hits the pan. Do not salt early — it draws out the moisture and dries the meat out. Get the pan screaming hot, slap the steak down, and chase that crust.
And yet. You follow that advice, and somehow the steak comes back gray. Steamed-looking. Pallid where it should be dark. The crust that was supposed to be mahogany and crackling turns out soft and pale. The interior that was supposed to be a rosy, even pink is a narrow band of pink sandwiched between two thick gray bands of overcooked meat on each side.
You did everything right. And it still went wrong.
The problem is not your technique. The problem is that the advice was always incomplete — and the part that was left out is the part that changes everything. Salt does draw moisture out of meat. That part is true. But what happens after that — what osmosis and diffusion do given enough time — is a completely different story. And understanding that story, combined with the physics of reverse searing, is the difference between a good steak and the kind of steak that makes people go quiet at the table.
I have tested this across more than three hundred steak preparations, adjusting salt timing, surface temperature, oven temperature, and resting periods in isolation. What follows is what actually works and exactly why.
🧪 The Science of Salt, Osmosis, and Why Timing Is Everything
Let us start with what salt actually does to meat, because this is where conventional wisdom gets the story half right and stops.
Osmosis — The Full Picture
When you apply salt to the surface of a raw steak, osmosis begins immediately. Salt is hygroscopic — it attracts water molecules. The salt concentration on the surface of the meat is now higher than the salt concentration inside the muscle cells, so water moves outward across the cell membranes from the area of lower solute concentration to the area of higher concentration. This is classical osmotic pressure in action.
Within the first 5 to 15 minutes of salting, you will see beads of moisture forming on the steak surface. This is the moment where the “salt dries meat” crowd stops watching and walks away. But they left too early.
Between 30 and 45 minutes, something important shifts. The salt that was sitting on the surface has now dissolved into that expelled moisture, creating a concentrated saline solution on the exterior of the steak. Now diffusion takes over — the process by which dissolved particles move from areas of high concentration to areas of low concentration. The salt-laden liquid begins to move back into the meat.
By the 45-minute mark, and more completely after several hours or overnight, that liquid has been substantially reabsorbed. But it is not the same liquid that left. It has been fundamentally altered. The salt has begun denaturing surface proteins, creating a brine that penetrates the muscle fibers and seasons the meat from within, not merely on the surface. Simultaneously, the surface itself has dried considerably — the moisture that did not reabsorb has evaporated, leaving a drier, slightly tacky exterior called a pellicle.
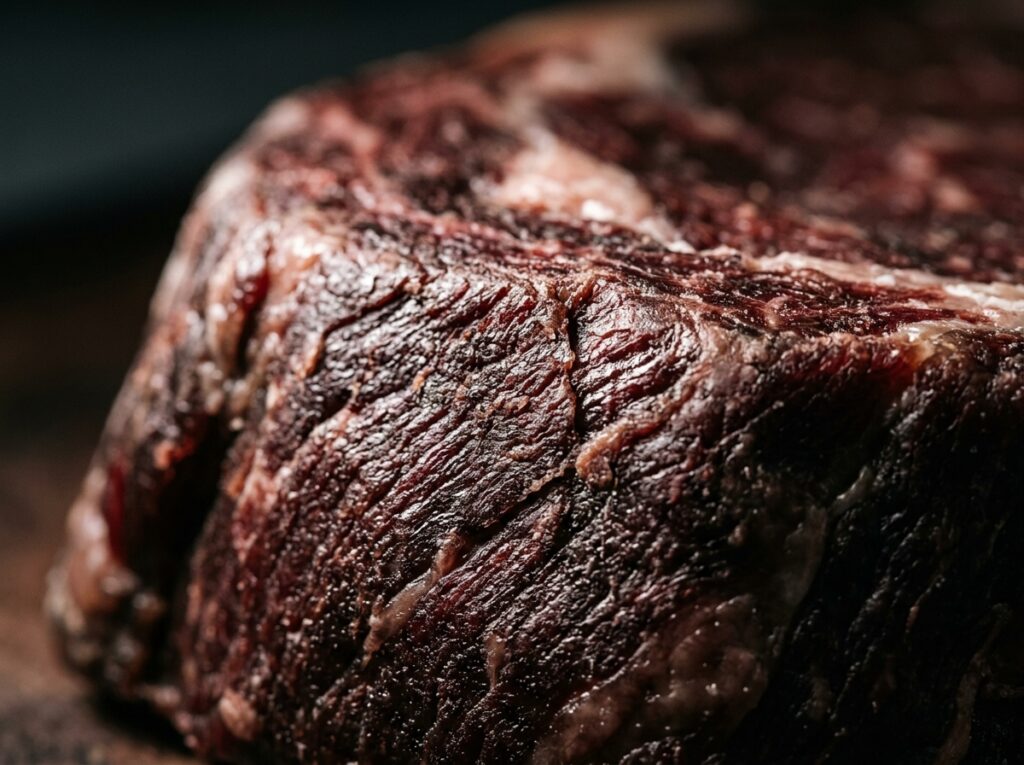
That dry pellicle is everything. It is the foundation of your crust.
This is why the window that will ruin your steak is not “salt it overnight” or “salt it right before cooking.” The danger zone is salting 5 to 45 minutes before cooking — long enough for moisture to be drawn out, not long enough for it to reabsorb. This is the gray, steamed steak window. Salt either well ahead of time or not until the last 30 seconds before it hits the pan.
The Physics of a Dry Surface — Why Wet Meat Cannot Brown
This brings us to the physics of crust formation, and here the mathematics are unambiguous.
The heat flux equation describes how heat moves through a surface:
q=−k∇T
Where q is the heat flux (the rate of heat transfer per unit area), k is the thermal conductivity of the material, and ∇T is the temperature gradient. In simple terms: heat moves efficiently from your hot pan surface into the steak’s exterior — but only when that exterior is dry.
Water has an extraordinarily high specific heat capacity. It takes enormous amounts of energy to raise water’s temperature. When your steak surface is wet, all of that incoming heat energy from the pan goes first into evaporating the surface moisture before it can raise the surface temperature high enough for browning. The Maillard Reaction — your crust — requires surface temperatures above 280°F / 138°C. Wet meat sitting in its own evaporating moisture cannot reach that temperature. It hovers around 212°F / 100°C — the boiling point of water — and stays there until all the moisture is gone.
By that time, the interior has been cooking far too long, and you have gray bands on both sides with a thin pink center. The surface did eventually brown — but only after significant damage was done below it.
A dry surface requires almost no energy to elevate to Maillard temperatures. The heat transfers directly and efficiently into flavor-generating browning reactions from the first second of contact.
In simple terms: a wet steak boils before it browns. A dry steak browns immediately. There is no middle ground.
Reverse Searing — The Physics of Low-and-Slow Then High-Heat Blast
Traditional high-heat searing from the start creates a massive temperature gradient inside the steak. The exterior hits 400°F immediately while the center struggles to catch up. By the time the center reaches your target temperature, the outer inch on each side is already well past it — hence those thick gray bands.
Reverse searing inverts this logic entirely, and it does so by exploiting thermal physics.
You begin the steak in a low oven — 225–250°F / 107–121°C — and bring it up to approximately 10–15°F / 5–8°C below your target internal temperature slowly and evenly. At this gentle heat, the temperature gradient across the steak is minimal. The entire mass of the meat approaches your target temperature at almost the same rate. The result is edge-to-edge even cooking — a uniform pink from the crust inward.
Then — and only then — you pull the steak, let the surface dry for a few minutes, and send it into a screaming-hot cast iron pan or onto a high-heat grill for 60–90 seconds per side. This final Maillard blast creates the crust. Because the steak is already at near-target temperature internally, the sear only needs to address the surface — and it does so with devastating efficiency.
The interior barely moves. The exterior transforms completely. This is the physics of precision cooking applied to a $25 piece of beef.
🛒 Pro Buying Guide — USA Market Picks
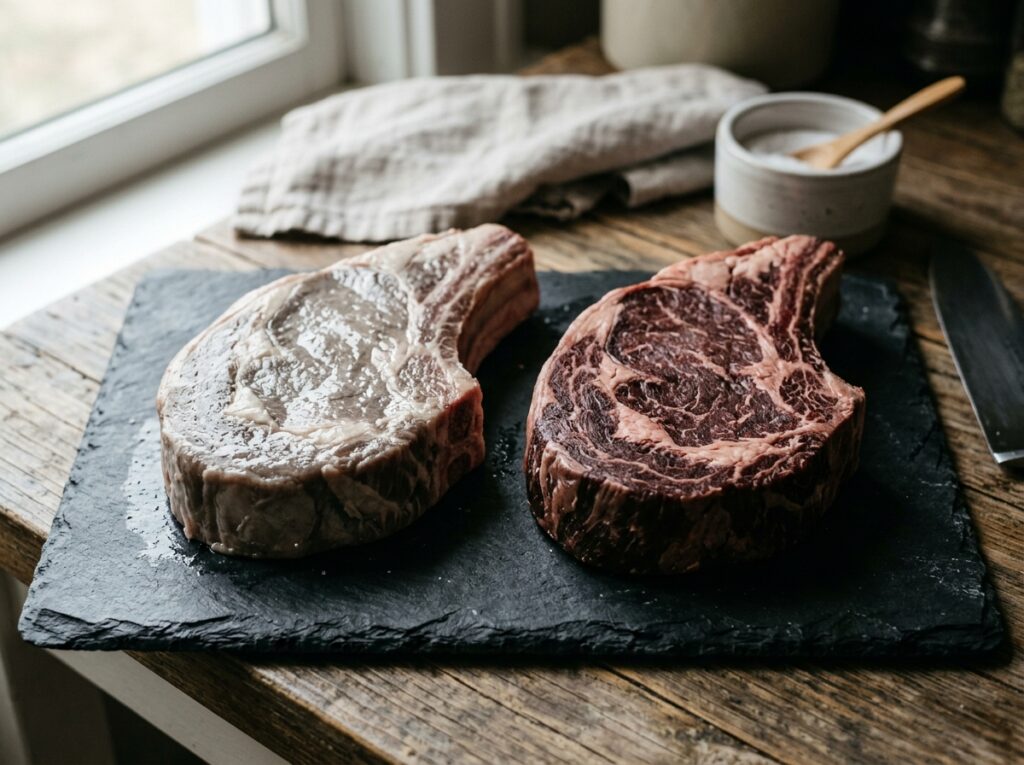
The Cut: For reverse searing, thickness is everything. You need at minimum a 1.5-inch / 3.8cm thick cut — ideally 2 inches / 5cm. Thin steaks cook too fast for the reverse sear to add value. Ribeye is the gold standard — the intramuscular fat (marbling) bastes the meat from the inside during the low oven phase. New York Strip gives you a tighter grain and slightly less fat, which some prefer.
For sourcing: Costco carries USDA Choice and Prime ribeyes at competitive prices — their Kirkland Signature Prime Ribeye is exceptional value. Whole Foods 365 brand Choice Angus New York Strip is consistently well-marbled. For premium dry-aged options, Snake River Farms American Wagyu (available online and at select Whole Foods locations) is the benchmark for home reverse searing. Walmart carries USDA Choice Black Angus steaks that perform well for the technique if budget is a consideration.
The Salt: Diamond Crystal Kosher Salt is the industry standard for dry brining — its crystal structure adheres to meat surfaces better than table salt and dissolves more evenly. Available at most Kroger, Safeway, and Whole Foods locations. Morton Kosher Salt works but is denser — use about 60% of the quantity if substituting.
The Pan: Cast iron is mandatory for the final sear. Lodge 12-inch Cast Iron Skillet is the workhorse — available at Target, Walmart, and Amazon for around $30. For serious steak cooks, the Stargazer 10.5-inch Cast Iron or Butter Pat Industries Heather skillet offer superior surface finish and heat retention. Carbon steel is an excellent alternative — the Made In Blue Carbon Steel skillet ($119 at madeincookware.com) heats faster and offers nearly identical results.
The Thermometer: The ThermoWorks Thermapen ONE at around $105 is the professional standard — it reads in under a second and is accurate to ±0.5°F. For a budget option, the Lavatools Javelin PRO at $35 (available on Amazon) is reliable and fast. Do not reverse sear by feel or by time — temperature is the only objective measure that matters.
The Fat: For the final sear, use a combination approach. Start with a high smoke-point neutral oil — Chosen Foods Avocado Oil (available at Costco and Whole Foods, smoke point 500°F / 260°C) — and finish with Kerrygold Unsalted Butter added in the last 30 seconds along with crushed garlic and fresh thyme for basting.
📋 Ingredients Table
| Ingredient | US Customary | Metric |
|---|---|---|
| Thick-cut Ribeye or NY Strip | 2 steaks, 1.5–2 inches thick, 12–16 oz each | 2 steaks, 3.8–5cm thick, 340–450g each |
| Diamond Crystal Kosher Salt | 1 tsp per side, per steak | 3g per side, per steak |
| Coarse black pepper | ½ tsp per side, per steak | 2g per side, per steak |
| Avocado oil (for searing) | 1 tbsp | 15ml |
| Unsalted butter (Kerrygold) | 2 tbsp | 28g |
| Garlic cloves, crushed | 3 cloves | 3 cloves |
| Fresh thyme sprigs | 3–4 sprigs | 3–4 sprigs |
| Fresh rosemary | 1 sprig | 1 sprig |
| Flaky finishing salt (Maldon) | Pinch, for serving | Pinch, for serving |
⚠️ Why Your Steak Looks Gray — Common Mistakes Table
| The Mistake | What Actually Happens | The Fix |
|---|---|---|
| Salting 5–40 minutes before cooking | Moisture draws out but cannot reabsorb — wet surface kills the crust | Salt 45+ minutes ahead or immediately before cooking — nothing in between |
| Cooking a cold steak straight from fridge | Massive internal temperature gradient, thick gray bands, cold center | Rest steak at room temp 30 minutes, or use reverse sear to equalize temp |
| Pan not hot enough before searing | Meat steams in its own moisture, gray exterior, no Maillard Reaction | Cast iron must be smoking before the steak touches it — 450°F+ / 232°C+ |
| Flipping only once | One-sided heat creates uneven gradient — gray on the long-contact side | Flip every 30 seconds during sear for more even crust development |
| Skipping the rest after cooking | Muscle fibers still contracted, juices rush out when cut, dry steak | Rest minimum 5 minutes per inch of thickness before slicing |
| Using a thin steak for reverse sear | Steak reaches target temp before the low oven does any meaningful work | Use only steaks 1.5 inches / 3.8cm or thicker for this technique |
| Cutting with the grain | Muscle fibers remain long and tough, chewy texture regardless of doneness | Always slice against the grain — perpendicular to the muscle fiber direction |
👨🍳 Step-by-Step Method
Step 1 — The Dry Brine (Done the Night Before)
Remove your steaks from their packaging and pat every surface completely dry with paper towels. Place them on a wire rack set inside a rimmed baking sheet. Apply Diamond Crystal Kosher Salt generously and evenly on all surfaces — top, bottom, and all four edges. Use approximately 1 teaspoon per side per steak. Add your coarse black pepper at this stage as well.
Place the rack uncovered in the refrigerator for a minimum of 45 minutes. Ideally, leave them overnight — up to 48 hours produces the most deeply seasoned, most surface-dry result. The refrigerator air acts as a dehumidifier, accelerating surface drying and pellicle formation. Do not cover them. Airflow is part of the process.
[📸 IMAGE PLACEHOLDER — Two thick ribeye steaks on a wire rack on a baking sheet, salted, uncovered in a clean refrigerator, overhead shot, clinical cool lighting showing the dry surface forming]
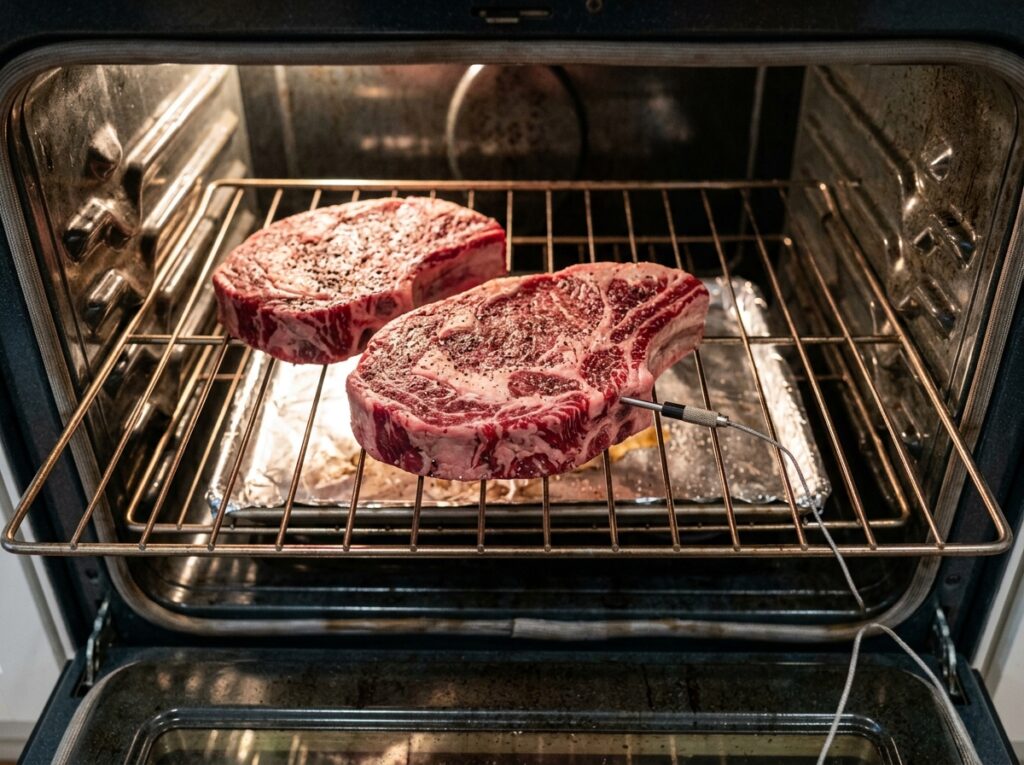
Step 2 — The Low Oven Phase
When you are ready to cook, remove the steaks from the refrigerator. Preheat your oven to 225°F / 107°C. If you prefer a slightly faster process with nearly identical results, 250°F / 121°C works well for steaks up to 1.75 inches thick.
Place the wire rack with steaks directly into the oven. Insert your probe thermometer into the thickest part of one steak, positioned away from any bone or fat deposits, aimed at the geometric center of the muscle.
Set your thermometer alarm to pull the steak at 10–15°F / 5–8°C below your target doneness temperature — reference the Degree of Doneness table below. The oven phase will take approximately 45–75 minutes depending on steak thickness and starting temperature. Do not rush it. This phase is building the uniform internal temperature that makes reverse searing different from every other technique.
Step 3 — Surface Preparation Before the Sear
When the alarm sounds, pull the steaks from the oven. This is a step most recipes skip entirely: pat the surface of the steaks dry again with paper towels. During the oven phase, a small amount of residual moisture will have come to the surface. Remove it. Then let the steaks sit uncovered at room temperature for 5–10 minutes. The surface will dry further through evaporation.
This small act of patience — those 5 minutes of additional air-drying — is the difference between a good sear and an extraordinary one.
Step 4 — The Final Sear
Place your Lodge cast iron skillet over the highest heat your stove allows. Let it preheat for a full 5 minutes. Add your avocado oil and let it reach the shimmer point — you should see faint wisps of smoke.
Place the steaks into the pan. Do not crowd them — work in batches if necessary. You will hear an aggressive, violent sear — that is exactly what you want. After 45 seconds, flip. Continue flipping every 45–60 seconds, alternating sides. This frequent flipping technique, validated extensively by food scientist J. Kenji López-Alt, produces a more even crust on both sides than the old “flip once” approach.
In the final 60 seconds, add the Kerrygold butter, crushed garlic, and thyme sprigs to the pan. As the butter foams, tilt the pan and use a large spoon to continuously baste the top surface of the steak with the aromatic butter. The butter will brown slightly — beurre noisette — adding nuttiness and depth to the crust.
Pull the steaks at your exact target internal temperature. The reverse sear means there is very little carryover cooking to account for.
[📸 IMAGE PLACEHOLDER — Dramatic action shot: thick ribeye in screaming-hot cast iron, butter basting in progress, spoon mid-pour, garlic and thyme visible in foam, fire and smoke, dark moody kitchen lighting]
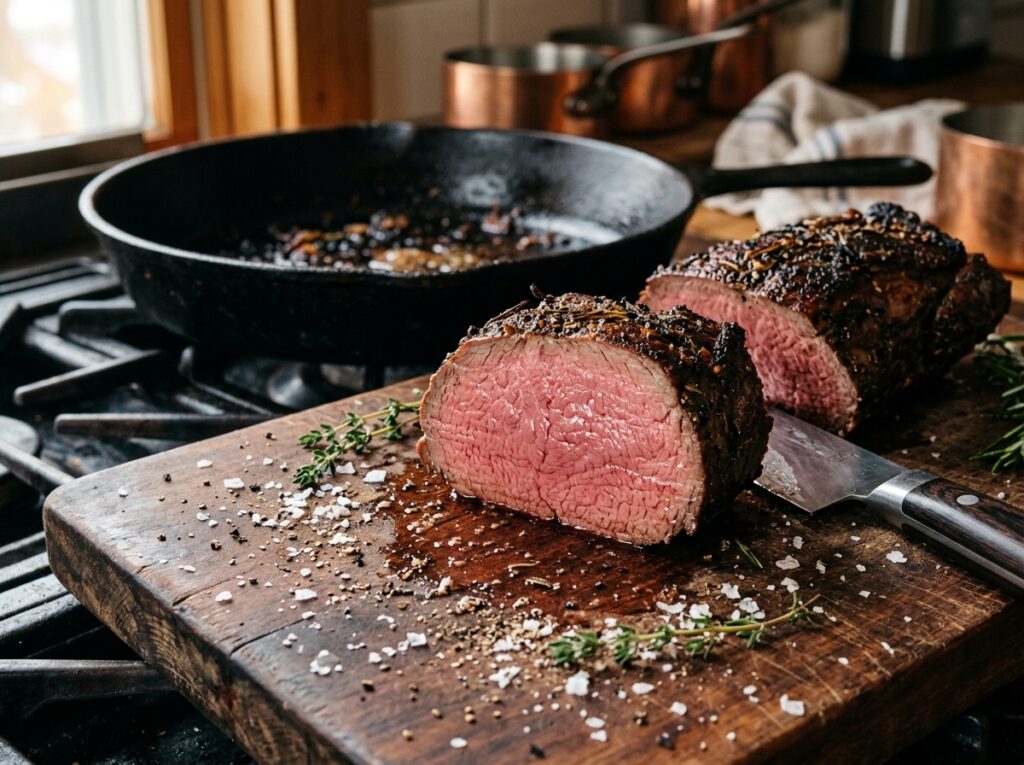
Step 5 — The Rest
Place the steaks on a clean cutting board or wire rack. Rest for a minimum of 5 minutes for a 1.5-inch steak, 8 minutes for a 2-inch steak. Do not tent with foil — foil traps steam and softens the crust you just worked to build. Resting allows the muscle fibers, which contracted under heat, to relax and reabsorb the juices that were pushed toward the center during cooking.
Finish with a pinch of Maldon flaky sea salt applied just before serving. Slice against the grain. Serve immediately.
🌡️ Degree of Doneness — Temperature & Resting Guide
| Doneness | Pull From Oven | Final Target Temp | Resting Time | Description |
|---|---|---|---|---|
| Rare | 115°F / 46°C | 125°F / 52°C | 5 minutes | Deep red center, very soft |
| Medium-Rare | 125°F / 52°C | 135°F / 57°C | 5–6 minutes | Bright pink, juicy, tender — recommended |
| Medium | 135°F / 57°C | 145°F / 63°C | 6–7 minutes | Light pink center, firmer |
| Medium-Well | 145°F / 63°C | 155°F / 68°C | 7–8 minutes | Slight pink trace, firmer texture |
| Well Done | 155°F / 68°C | 165°F / 74°C | 8–10 minutes | No pink, fully firm — not recommended for ribeye |
USDA recommends 145°F / 63°C minimum internal temperature for whole muscle beef steaks.
💬 Chef Hamid’s Insight
The perfect steak is fundamentally an exercise in patience — and Americans struggle with this more than almost any other cooking challenge I have observed. We are a culture of immediate heat and immediate results. We want the pan on high and the steak in the pan and the crust in the first minute. And I understand that impulse completely. The sizzle feels productive. The high heat feels correct. But the steak that wins every blind tasting, every time, without exception, is always the one that spent an hour in a quiet 225-degree oven before it ever touched cast iron. The physics do not negotiate. You cannot shortcut the temperature gradient. What you can do is learn to see the slow phase not as waiting — but as the actual cooking. The sear is just the punctuation at the end of a sentence the oven already wrote.
Patience is not a virtue in steak cookery. It is the technique.
— Chef Ahmad | The Flavor Bazaar
🥗 Nutrition Table
Per serving (one 12 oz / 340g ribeye steak, trimmed, cooked with butter baste). Values are estimates.
| Nutrient | Per Serving |
|---|---|
| Calories | 740 kcal |
| Protein | 68g |
| Total Fat | 52g |
| Saturated Fat | 22g |
| Carbohydrates | 0g |
| Sodium | 890mg |
| Cholesterol | 215mg |
| Iron | 4.8mg (27% DV) |
Nutritional estimates vary based on steak grade, trimming, and finishing fat used.
🌡️ Food Safety Temperature Guide
| Stage | Temperature | Notes |
|---|---|---|
| USDA minimum for whole muscle beef | 145°F / 63°C | With 3-minute rest — applies to steaks, roasts |
| Reverse sear oven temperature | 225–250°F / 107–121°C | Low and slow for even internal cooking |
| Final sear surface temperature | 450°F+ / 232°C+ | Cast iron must be at this temp before steak contact |
| Danger Zone | 40°F–140°F / 4°C–60°C | Do not hold cooked steak in this range |
| Carryover cooking (reverse sear) | +2–3°F / 1–2°C | Minimal carryover — one advantage of reverse sear method |
| Dry brine refrigerator temp | 34–38°F / 1–3°C | Keep steak uncovered on rack for maximum surface drying |
🧊 Storage & Reheating Table
| State | Refrigerator | Freezer | Best Reheat Method |
|---|---|---|---|
| Cooked steak (whole, unsauced) | 3–4 days, wrapped | Up to 3 months, vacuum sealed | Low oven 250°F / 121°C, 20–25 min, then 60-sec cast iron sear |
| Cooked steak (sliced) | 2–3 days, airtight | Up to 2 months | Covered skillet, low heat, splash of beef broth, 3–4 min |
| Raw dry-brined steak (uncovered) | Up to 48 hours on rack | Not recommended after brining begins | Cook from refrigerator — go straight to oven phase |
| Raw steak (unwrapped, pre-brine) | 3–5 days | Up to 6 months, vacuum sealed | Thaw overnight in refrigerator — never at room temperature |
❓ FAQ
Does the reverse sear work on a gas grill instead of an oven?
Yes — with modifications. You need to create an indirect heat zone by lighting only one side of the grill and maintaining the unlit side at 225–250°F / 107–121°C with the lid closed. Place the steak on the unlit side. Once it reaches pull temperature, move it directly over the lit burners on high for the final sear. The technique translates well, though oven temperature control is more precise.
Can I dry brine for just 45 minutes or does it have to be overnight?
Forty-five minutes is the functional minimum where the reabsorption cycle has had enough time to work. It will produce a meaningfully better result than immediate cooking. Overnight (12–24 hours) is noticeably better than 45 minutes — the pellicle is drier, the seasoning penetrates deeper, and the crust that forms is darker and more developed. If you have the time, use it.
Should I use butter or oil for the initial sear?
Both, in sequence. Start with a high smoke-point oil — avocado oil being the best USA option — because the pan is at temperatures that will burn butter instantly. Add the butter only in the last 45–60 seconds of searing, along with aromatics, strictly for basting and flavor. This gives you the heat tolerance of oil and the flavor depth of browned butter without burning either.
My cast iron keeps setting off the smoke alarm. What am I doing wrong?
Nothing — this is expected when you are cooking at the temperatures reverse searing requires. Use your range hood on maximum, open a nearby window, and if necessary, temporarily disable the nearest smoke detector while cooking (re-enable it immediately after). Alternatively, move the final sear outdoors to a gas grill or charcoal setup, which many serious steak cooks prefer for exactly this reason.
Is the reverse sear worth it for a thinner steak like a 1-inch sirloin?
Honestly, no. Reverse searing adds the most value on steaks 1.5 inches / 3.8cm and thicker — where the temperature gradient problem is actually significant. A 1-inch steak cooks fast enough that traditional high-heat searing with proper surface prep delivers comparable results. Save the reverse sear for when you buy thick. Buy thick whenever you can — it is always the better path.
Leave a Reply